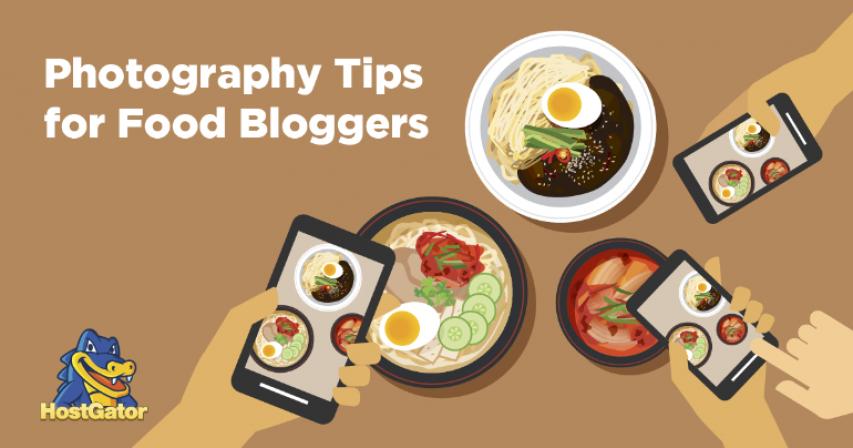
TRICKS FOOD BLOGGERS USE TO GET GOOD PHOTOS
- 3 years ago
Before I start let me just put it out there that I am by no means a professional photographer. I am not trained in any sense of the word and I don’t really know what I’m talking about if truth be told. However, I have now been blogging for about 8 years and there is no question that my photos have improved a lot since those early days. It’s kind of been a learn on the job type thing and there are definitely some tricks I’ve picked up along the way to get good photos of food.
You don’t need lots of fancy equipment and you don’t need the flashiest camera going, but you will need a few basic bits of kits, time, and practice, and lots of imagination. If you want your blog to stand out from the masses and masses of other websites out there, then upping your photography game is a must in my opinion. And this is especially true if you are a food blogger, because as the saying goes “you eat with your eyes first” – your foodie pics must be good enough to make the viewer be virtually salivating all over their screens!
I thought I’d put together 5 of the tricks I use to take food and product photos and to explain these in an easy-to-understand way (anyone else switch off when it gets too techy?) so that you too can create beautiful pics of your food.
1. Backdrops and Props
You know all those gorgeous pics you see on Instagram where the food looks like it’s been properly professionally styled on a backdrop of rustic wood or chic marble? Well, let me let you into a secret, they’re backdrops. In fact, more often than not, they’re wallpaper samples. Yep, that’s right, wallpaper samples. I’ve done it myself, so I know. Now the thing about wallpaper is that it can be a bit hit and miss in quality and with things the way they are in the world right now it isn’t exactly as easy as popping down to your nearest DIY store to pick up some samples. So, it’s worth investing in a bit of kit to make your culinary concoctions shine.
I was recently sent this awesome bag of tricks from the Paper Bag Food Co, which is the perfect beginner kit for budding food bloggers.
#TheFoodieBag contains:
5 in 1 Pop Up Reflector – 15-inch white/gold/silver/black photographic reflector and diffuser to brighten and enhance the highlights and shadows of your subject matter.
4 A2 Backdrops – White marble, black rusty marble, buff plaster, and a mottled mid green one.
8 Photo Postcards – Complete with useful photography tips including: how to find the right angle, how to edit your images better, and finding good light.
The Bag – Because let’s not forget the bag! A MASSIVE sturdy black cotton zip-topped bag, with inside net divider and pocket. It’s Mary Poppins carpet bag proportions are such that there’s enough space for all the kit listed above as well as for any shopping you need to do for ingredients etc.
Priced at £39.95 inc P&P & VAT with same day dispatch for the impatient among us it is a blinking’ bargain.
So that’s your backdrops sorted, what other props can you use. Well firstly it’s probably a good idea to work out what style you’re going for, especially if you mainly post on Instagram where it is more important than ever to have a ‘theme’. I don’t tend to use too many props as I like the main focus to be on the food itself, however that’s just me. Hunt in charity shops, car boot sales, or on eBay for vintage crockery, cutlery, bakeware, linens, tableware etc. Anything that adds interest and a different dimension to the photo is good.
2. Lighting
Probably the most important thing you need to get right… lighting. Nothing beats photos that have been taken in natural light. Try it. Take a picture of your lunchtime sandwich in a naturally well-lit spot in your house or in your garden and then take another in a more shady area and compare the two. You should notice a huge difference. However, with the darker seasons rapidly drawing nearer it becomes more difficult to find those lovely bright light moments and so that’s when you should think about investing in a few bits of lighting kit to assist you.
My husband bought me a pop-up lightbox for Christmas about a year ago and that is brilliant at getting just the right light, particularly when shooting from above or if the subject matter has a lot of detail that needs picking out. I’m looking forward to playing around with this and my new backdrops to hopefully create some striking new images over the next few months.
On the flipside, too much light, or the use of a flash can create glare and an orangey tone to the photo that will look fake and actually make the food less appetizing to the viewer.
3. Presentation
How you position and present your food is crucial to achieving the perfect pic. Always make sure you clear up any drips, spillage, or mess on the side of plates or surfaces etc., otherwise it just looks messy and isn’t pleasing to the eye. It detracts from the main subject of the photo, which kind of defeats the purpose right?
Play around and take photos of your food from different angles, after all that’s one of the perks of the digital age we live in, you can simply delete any shots you don’t like. Move the food around, change the set, try acting shots, spill things on purpose, introduce different props, basically have fun!
The main thing you’re after is to create authenticity in your photos, which means the food should look as though it could jump off the screen and into someone’s mouth. It should look and feel real to the viewer and that means capturing something that is ‘ready to eat’. Some examples of how to achieve this is by putting straws in drinks, removing any packaging, or placing cutlery into food to make it look as though the picture has been snapped mid meal or that the viewer is interrupting the diner mid mouthful.
4. Rule of Thirds
This is a well-known ‘rule’ in the world of photography and one that is so simple to implement, but with amazing results. The rule of thirds is a photographic composition that captures the subject in a way that is pleasing to the eye. To ensure your subject abides by the rule of thirds you need to imagine a grid of nine equal squares, a bit like a nought and crosses board. Where the horizontal and vertical lines intersect are your points of interest and you should be aiming to align the main part of your image at these points.
It doesn’t mean it’s wrong not to follow this rule, you can actually create striking imagery without following it (see below) but it’s a handy trick to have under your belt if you’re struggling for inspiration. I often take close up pictures of my recipes placed in one third of the photo and a blank backdrop taking up the other two thirds and there is no question that your eye is somehow automatically driven towards looking at the food, which of course is exactly what you want to happen. Give it a try and see what you think.
5. Editing
OK so this one feels a little bit cheat, but hey when we’ve got all this technology at our fingertips it would be a crime not to use it! Filters, cropping, blurring, contrast… there are so many different things we can do these days to manipulate our photos that it’s more or less impossible to not end up with a result that is vaguely decent.
I went through a phase of using my Olympus Pen to take food photos, which generally worked well despite me not spending enough time trying out all the features and learning some of the basics. However, having gone through 2 of them in quick succession due to a lens failure (it kept getting stuck and I was sent another under guarantee, but the same problem happened again), I switched over to my phone camera (a Samsung Galaxy S10) and it does an equally if not better job and is far easier to use. I tend to only use the editing features on my phone as well as those on Instagram and then share the final photo between accounts. It’s enough for me at the moment, but if you’re after something more than it’s worth checking out Adobe Lightroom, Photoshop, or Canva if you want to add graphics or combining photos to make a collage or blog banner etc.
To be a true pro at food photography takes training, practice, and some degree of artistic flair, but hopefully 5 few tricks will help set you on your way to creating beautiful droolworthy images of the food you create. Good luck!


Comments